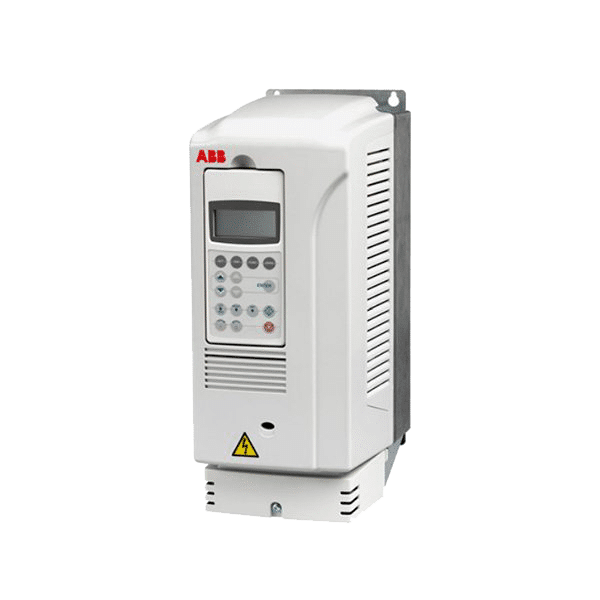
ABB ACS355 Training Lesson 5: Basic Start Stop Selector Switch Control Wiring & Programming – VFDs
About This Video
This video will cover the complete wiring and parameter programming setup of a start, stop switch integrated into a control panel on the ABB ACS355 variable frequency drive. This process is quite simple and it offers a great option for people who are interested in using a start and stop switch for controlling their drive instead of the standard keypad.
Video Transcript
Hello everyone, I’m Craig Chamberlain with Precision Electric at precision-elec.com, your automation service center. We do drives, motors, controls, we’ve been doing it for over 30 years so if you have any questions feel free to swing by our website. We also sell all these drives online, and you can get pricing and availability and basically answers to any questions you might have.
So, today’s video we’re going to continue the ACS 355 series tutorials, and we’re going to be covering not the push-button start-stop control like we did in the previous one, instead, we’re going to be doing selector switch start-stop control. And essentially, we need to be able to issue a start command by flipping the switch on, and we can also do a forward and reverse by flipping the second switch. You actually if you don’t even have forward and reverse you can wire and set this drive up with just one switch and you can run it remotely however you’d like. And as with the previous videos we’ve already got this set up for speed pot control, so we can control our speed using the speed potentiometer. So, let’s go ahead and get it wired in programmed and show you what it can do.
First, we’re going to cover how to actually change the program so that it looks for a selector switch instead of a push-button. In the previous video, we switched to a three-wire macro. This three-wire macro looked for a momentary signal in order to issue the start command of the drive. In a selector switch scenario, there is no momentary signal. The signals actually maintain so while the selector switch is on electricity is constantly flowing into the drive on the control strip.
So we need to change the actual program to look for a constant signal for a start command instead of a momentary one. Well the nice thing about these drives is as we’ve discussed through this series, is they’ve got a number of different macros. Conveniently, the standard macro which we switched from in the previous video actually was already set up for selector switches. So we’re going to switch back to the standard macro because we’re essentially changing the way we’re starting our drive. So, let’s go ahead and press the menu button, go to
parameters and press enter. Then we’re going to scroll down to parameter group 99 again and we’re going to select the select button we’re going to scroll down to parameter 99 O2 application macro and click Edit and we’re going to change it from three wire back to ab2b standard and click Save. You may or may not have heard that but it does make a slight clicking sound when you switch the macro. That’s fine. Let’s go ahead and click exit, and click exit again, and exit again, and we’re back on our home screen. That is actually all there is for setting up the actual programming.
Now let’s look at our wiring. Now we’re actually going to be working with the exact same terminals we did in the previous video. Terminal number nine is where our low voltage electricity flows from. So terminal nine is going to come into both sides of our switches. It’s going to come into one side of our forward reverse switch and one side of our start/stop switch. The electricity is going to flow from this – from nine into our the first side of our start switch, and then on the other side of our start switch, it’s going to flow back into terminal 12.
On the print, you’ll see that terminal 12 is our digital input that is set up for start/stop control. For the stop switch, I’m sorry, for the forward-reverse switch we’re flowing from terminal 9 into our switch for forward-reverse and then it’s flowing from the other side of the switch into terminal 13, where if you look at the print is actually the forward and reverse command. When there’s no electricity flowing from 9 to 13 it’s going to run forward when our switch is closed and electricity is flowing from 9 to 13 it’ll go in Reverse.
When electricity is flowing from 9 to 12 the drive will start. When it’s not flowing from 9 to 12 it will stop. So these are the only wires we need the wire to set this up and as always in the previous video and the other videos before this anytime you’re running this type of setup we’re voltage is flowing through your switches you do have to have a jumper between terminals 10 and 11. So don’t forget to add that jumper as well. Let’s go ahead and run it.
So what I did is I set up this switch right here in the middle for my start/stop command right now it’s open so there’s no electricity flowing between 9 and 12 so it’s not started. I set this switch up for my forward reverse so right now there’s no electricity flowing from 9 to 13 and so it’s going to run forward. Now when I close this switch notice nothing happens. That’s actually kind of convenient that this has happened as we’ve discussed in previous videos is when it’s in local control the drive only works from the keypad. So, right now I can start it and stop it from the keypad. You actually have to make sure you press this local remote, this is a very common thing call we get, you actually have to make sure you press this local remote button in order to switch the drive into remote control. So now that I’m in remote control and the start command is issued, the drive is running. If I open that back up, the drive will stop so let’s go ahead and do that one more time so the drive is running.
As we set up in the previous video we have a speed pot so I can adjust the speed at any time with the speed pot. Then once I flip my second switch the drive is going to decelerate whatever rate of deceleration I specified, and it’s going to head in the opposite direction at whatever acceleration I specified. And the acceleration and deceleration are set up in the startup data when you go through the start of this system as we did in the previous video so that is how it’s done. That’s how you set up your forward reverse for selector switch startup and when I want to stop it, I just make sure the switch is open.
So, if you have any questions make sure you swing by our website at precision-elec.com. Were your industrial automation service center, drives, motors, controls. We’ve been doing it for over 30 years and again, if you run into any problems, that’s what we’re there for. We sell these drives and we also support what we sell. Feel free to swing by our YouTube channel and like, share, and subscribe and check out the other videos we have. Thanks again.
