Invertek Optidrive E3 Training Lesson 2: Basic Parameter Programming & Startup – VFDs
About This Video
This video covers the basic parameter and commissioning startup of an Invertek Variable Frequency Drive.
Video Transcript
Hello everyone my name is Craig Chamberlain with precision electric at precision-elec.com. Your industrial automation service center. Drives, motors, controls; we’ve done it all for over 30 years. If you have any questions, make sure you give us a call.
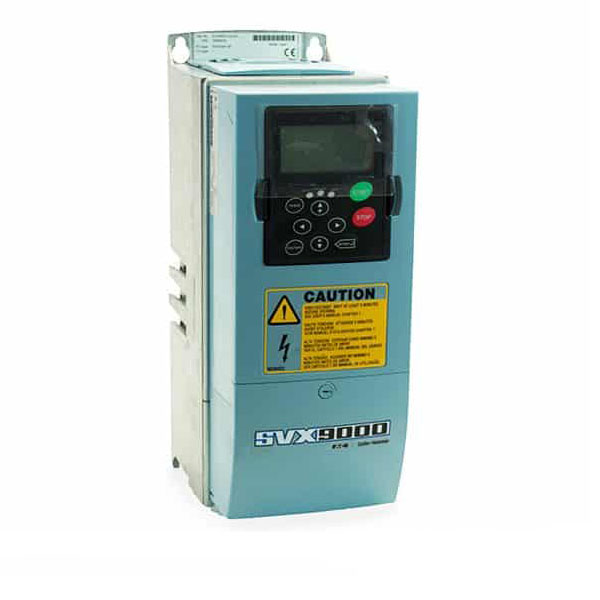
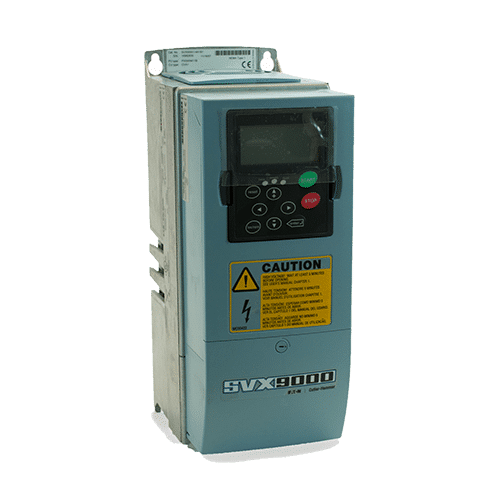
Today we’re continuing in our series for the SVX9000 drive from Eaton and we’re recovering how to use push buttons to start our drive instead of selector switches. Now in the previous video we used a basic macro that was built into the drive. In this one we’re gonna actually I have to modify a macro because there is no macro for push buttons, believe it or not, for the Eaton Drive. So, let’s go ahead and get it programmed and wired and then get started! Okay, so what I did in the manual was I modified the standard application macro which we will actually set up here after we’ve done our wiring. And I’ve modified it so that I have a normally open push button that goes between terminal 6 and terminal 8 and that’s from my start forward which will be programmed for pulse. And then I wired a normally closed push-button which is my stop button going from terminal 6 to 9 which will be stop pulse. Then finally for my digital input 3 which is terminal 6 to terminal 10, I actually wired a reverse selector switch so that I could still do forward and reverse.
Now if you guys don’t need reverse you can just leave that whole part out; that’s really up to you. So, let me go ahead and show you what it’ll look like actually being programmed. So, I’m gonna pull off the terminal block hold it up here, and here’s my wiring. And now my terminal 6 is my plus 24 volts. This goes to the common on both of my push buttons and on my selector switch. The voltage flows out to that to my first push button which is my start which is normally open. So when I press that start button voltage will flow from 6 to 8. After that I wired 6 again to the common of my normally closed, my stop button and my stop button which is normally closed. Voltage will always be flowing between 6 and 9 and then when I press the stop button it’ll actually stop the flow. And that’s just how stop buttons are always wired you always want them closed in case a wire falls out. So essentially, when I press the stop button it’s gonna stop a connection between six and nine. And then finally I have my wire six wired to my selector switch common and on the other side of the selector switch. If I close the switch it’ll actually allow voltage to flow from six to ten which will tell the drive to go in reverse.
Now I’m gonna go ahead and put that back in there and we’re gonna apply power. and then we’re gonna actually have to program our standard macro so that it supports this new wiring diagram. So upon first boot it’s asking me if I want to copy parameters. Right now, I’m going to tell it no and then right now I’m in remote control. So I’m gonna press local remote. It’s gonna say select local, press enter so I’m going to go back to local, this is so I can program it, I’m going to use my arrow keys to get to the programming screen. This is programming: press enter. So I’m going to press ENTER to go to programming. And we’re looking for parameters G one through G nine. Now if I pull out my manual again, let me show you which parameters we’re going to be modifying. Here we’re modifying parameters one point two point one and one point two point. These particular parameters are our start/stop logic and our digital input three function which is going to be our reverse. We’re going to be setting that to reverse here; which is number six. Now before it will let me actually change these parameters, if you recall in our previous video we’re actually on the generic or the basic application. The basic application will not let you change these parameters. So the very first thing we need to do is to go down to system. System menu, press the right arrow key and we’re gonna change our macro to the standard macro. So, let me scroll down through these until I find application. Right now yours will say basic. If you press Enter, I’m sorry press the right arrow key, I can now fluctuate through different applications. I’m gonna go to standard and I’m gonna press ENTER and it’s gonna reset the drive. Now what that’s doing is it’s switching this basic application macro over to our standard application macro. And now I’m actually going to program it for my proper selector switch. I’m in my proper push-button settings. So let me go back to our parameters So I’m gonna go back over to programming, press ENTER. Again, I said parameter g1 through g9, we’re going to this particular section here. Parameter 1 point 2 point 1 is our first. So I’m gonna press right. And up here in this corner, you may or may not see it in this video, but it says G 1 point 2 and that’s where we want to be. We want to go to one point two point one first. So its input signals, Im going to press right again and here’s one point two point one. I’m going to press write again and this is where I can actually adjust how my drive starts and stops. By default it’s just standard start and stop. Which means you have to have a selector switch but what we’re looking for is on the right here: is start/stop pulse. Which means a momentary flow of voltage is what’s going to start and stop it. So let me go up through here. Start-pulse-stop-pulse. I’m gonna press ENTER. And so one point two point one is done. Now I’m gonna go to one point two point two which is our digital input three. I’m gonna press right again and I’m gonna scroll up through these until I find my reverse function. Which is right here I’m gonna press ENTER and that is it for programming. I’ve set up both my digital inputs for start and stop. My first two digital inputs and then I also set up my third digital input for my forward reverse on the selector switch.
So let’s go ahead and test it. Okay, so now that we’re running and I’ve got it programmed; I’ve got it in operation mode. Right now I’m still in local so I need to switch from local back to remote. Otherwise it’s not going to look my push-button station. In local it only looks at the keypad. So I’m gonna press local remote and I’m gonna press enter which will switch to look at my terminal strip. Now here’s my start button if I press it, you’ll notice that it starts which is good. Now stop is my normally closed so when I press this it breaks that connection so that it no longer will be running so it stops. Now if I start it and slip on my selector switch, it’ll slow down and automatically go into reverse. Now this will keep running until this stop is broke. So in other words until it drops out from that input because it’s normally closed or until I press this stop button.
And that’s all there is to this video. I know its kind of involved on the SVX 9000 because out of the box they don’t ship with a macro for pushbuttons so we have to go in there and manually set it up to be able to read these push buttons the way a normal person would wire it up.
Again, if you have any questions: we repair, we sell SVX9000s. We get a good amount of them in here every single week so don’t hesitate to give us a call. Again, my name is Craig Chamberlain at precision-elec.com and we’ll see you in the next video!
