6 Step Basic Setup Of An SMV Variable Frequency Drive
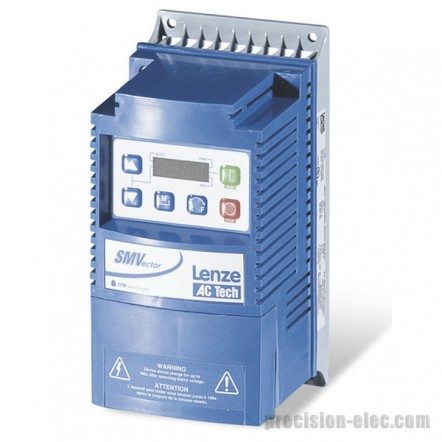
If you want complete control over every aspect of your motor, we recommend the SMVector Series variable frequency drive.
The SMVector Variable Frequency Drive is our product of choice for the majority of customer’s applications. There are a number of factors that make us consider it the best option in the market today. One reason it that it’s extremely cost effective compared to many of their competitors. The SMVector Variable Frequency Drives comes in sometimes 20% to 50% less expensive than their counterparts. Another reason to consider the SMVector Variable Frequency Drive is the ease of setup.
This post aims to show the basic setup and configuration of an SMVector Variable Frequency Drive.
1. Turn Off All Line Power
SMVector Variable Frequency Drives come in four different voltages: 120 VAC, 240 VAC, 480 VAC and 600 VAC. No matter what voltage you have it is extremely important to shut off all power prior to wiring your drive. This is extremely important to avoid injury or death. If you are umcomfortable working with these voltages we also recommend hiring a licensed contractor to do the installation for you.
2. Wire The Input Line Voltage
The second step for the basic setup of an SMVector Variable Frequency Drive is the wiring of the input line voltage. Here is a basic overview of the different wiring options for the SMV drive. If you’re running single phase, you may also benefit from reading up on how the SMVector will can be used To Run A 3 Phase Motor On Single Phase Power.
- Single Phase, 120 VAC: Wire and fuse your hot wire to L1 and wire your neutral to N.
- Single Phase, 240 VAC (two hot lines): Wire and fuse your two hot lines to L1 and L2 respectively.
- Single Phase, 240 VAC (one hot line): Wire and fuse your hot line to L1 and wire your neutral to L2.
- Three Phase, 240 VAC: Individually wire and fuse all three hot lines to L1, L2 and L3 respectively.
- Three Phase, 480 VAC: Individually wire and fuse all three hot lines to L1, L2 and L3 respectively.
- Three Phase, 600 VAC: Individually wire and fuse all three hot lines to L1, L2 and L3 respectively.
You will also want to reference the SMVector manual on page 16 for a diagram of how to wire it. Don’t forget to wire an earth ground to the PE terminal as well.
3. Wire The AC Motor
The SMVector Variable Frequency drive currently only support three phase motors. Wiring the motor is extremely easy as there really is only one way to do it. The reason the SMVector currently only supports three phase motors is because it is typically used in industrial applications where higher horsepower and torque is required.
Simply individually wire your motor leads to U, V and W. Don’t forget to also wire your ground wire to the PE ground terminal on the SMV.
4. Jumper The Drive Enable
For basic setup we will be running the drive directly from the keypad so we will not need any custom wiring to the control terminals. One essential thing we need, however, is to electrically enable the drive by putting in a jumper on the control terminals. In order for the drive to enable on power up place a wire jumper between terminals one and four. For a diagram see page 19 of the SMVector Users Manual.
5. Power Up The Drive
You can now power up the drive once you are confident you have wired everything correctly. On powerup the LED screen should come up for programming. At this point in time the default settings should allow you to simply press the start button on the keypad for the drive to run. If you wish to adjust the speed you can use the up and down arrows on the keypad.
6. Finish Your Setup
There are some essential parameters you should set in your SMVector to protect the motor and the drive. See them below, you will want to reference the SMVector Variable Frequency Drive operators manual when doing this. If prompted for the password when entering the parameter menu (by pressing the menu button) then you’ll need to use the arrow keys to enter the default password of 0225.
Set the following parameters to complete your setup:
- P102 – Minimum Frequency (Speed)
- P103 – Maximum Frequency (Speed)
- P104 – Acceleration
- P105 – Decleration
- P108 – Motor Overload (Important for Motor Protection)
- P110 – Start Method (If you want to start on power up)
- P111 – Stop Method (If you want to coast or ramp to stop)
- P112 – Rotation (If you want to change direction)
Conclusion:
The SMVector is capable of very advanced features including sensorless vector control and a full range of control terminal options. If you purchased your drive from us then we strongly recommend contacting us if you have any questions or concerns regarding this drive. We are also capable of Variable Frequency Drive Repair which includes repairing them or determining if they are worth repair. You can get a free quotation by contacting us as well.


Trackbacks & Pingbacks
[…] installation to fine-tuned system optimization. We have explored its core functionalities, covering basic setup and advanced programming for peak motor efficiency. Ultimately, this adjustable frequency drive […]
[…] basic setup, the Benshaw soft starter allows for advanced parameterization to optimize performance for specific […]
[…] 6 Step Basic Setup Of An SMV Variable Frequency Drive […]
Comments are closed.